Berikut adalah ditunjukkan cara mencipta blog anda langkah demi langkah.
Below is the step-by-step instruction on how to create your very first blog.
1. Buka laman blogspot
http://www.blogspot.com (Open this weblink)
 |
| Creating a blog tips - Klik untuk besarkan - Click to enlarge |
2. Log masuk menggunakan akaun
Gmail atau Yahoo anda. Sekiranya tiada anda boleh mendaftar atau click di
[Dont have a Google Account?] Get Started. Setelah selesai anda akan dibawa ke page seterusnya.
Login in using your gmail or yahoo. If you dont have any, please click [Dont have a Google Account?] Get Started to register. Once done, another page will appear (see below)
 |
| Creating a blog tips - Klik untuk besarkan - Click to enlarge |
3. Selepas itu anda akan terus dibawa masuk ke page "
Dashboard" anda. Klik
"Create your blog now".
After that, Dashboard page will appear and click "Create your blog now".
 |
| Creating a blog tips - Klik untuk besarkan - Click to enlarge |
4. Masukkan nama blog anda dan kemudian masukkan alamat blog yang anda inginkan dan klick "Check Availability". Sekiranya alamat blog anda sudah digunakan oleh orang lain, anda perlu menggunakan alamat lain sehingga status menunjukkan "This blog address is available" dan klik continue.
Add A Blog Title and add your desired blog address and click "Check Availability". Once available then click continue.
 |
| Creating a blog tips - Klik untuk besarkan - Click to enlarge |
5. Setelah itu, anda boleh pilih template atau rupa blog yang anda mahukan. Template ini masih boleh ditukar selepas ini, jadi jangan risau. Seterusnya klik continue.
Choose the template. Please note that the template can always be changed later. Then click continue
 |
| Creating a blog tips - Klik untuk besarkan - Click to enlarge |
6. Selepas itu paparan menyatakan yang Blog anda telah berjaya dicipta. Klik Start Blogging.
Then the message shows that your blog has been created. Click Start Blogging
 |
| Creating a blog tips - Klik untuk besarkan - Click to enlarge |
7. Mulalah menulis catatan pertama anda. Start writing your first blog then.
 |
| Creating a blog tips - Klik untuk besarkan - Click to enlarge |
8. Untuk memasukkan gambar ke dalam posting, klik butang gambar. (rujuk gambar) To add image to posting, click image button (refer image)
 |
| Creating a blog tips - Klik untuk besarkan - Click to enlarge |
9. Gambar boleh dipilh dari 4 sumber utama iaitu dari cakera komputer anda, laman blog, web album ataupun link imej dari internet. Sila pilih dari salah satu sumber dan klik "Add selected".
Image can be choose from 4 different source i.e your computer hard disk, web page, web album or image link from internet. Once chosen, click next.
 |
| Creating a blog tips - Klik untuk besarkan - Click to enlarge |
10. Setelah gambar dimasukkan, click pada gambar dan menu pilihan akan ditunjukkan. Pilih saiz gambar, kedudukan dan juga masukkan "caption" pada gambar sekiranya ada. Once added, click on the image then menu will appear to change it size, position and to add caption.
 |
| Creating a blog tips - Klik untuk besarkan - Click to enlarge |
11. Selepas selesai klik save now untuk menyimpan posting ini sebagai draf (tidak akan keluar di blog anda), klik preview untuk melihat dahulu dan klik publish post sekiranya sudah berpuashati. Click save to save posting as draft, click preview to see whether everything is in order and click pulish post to published it.
 |
| Creating a blog tips - Klik untuk besarkan - Click to enlarge |
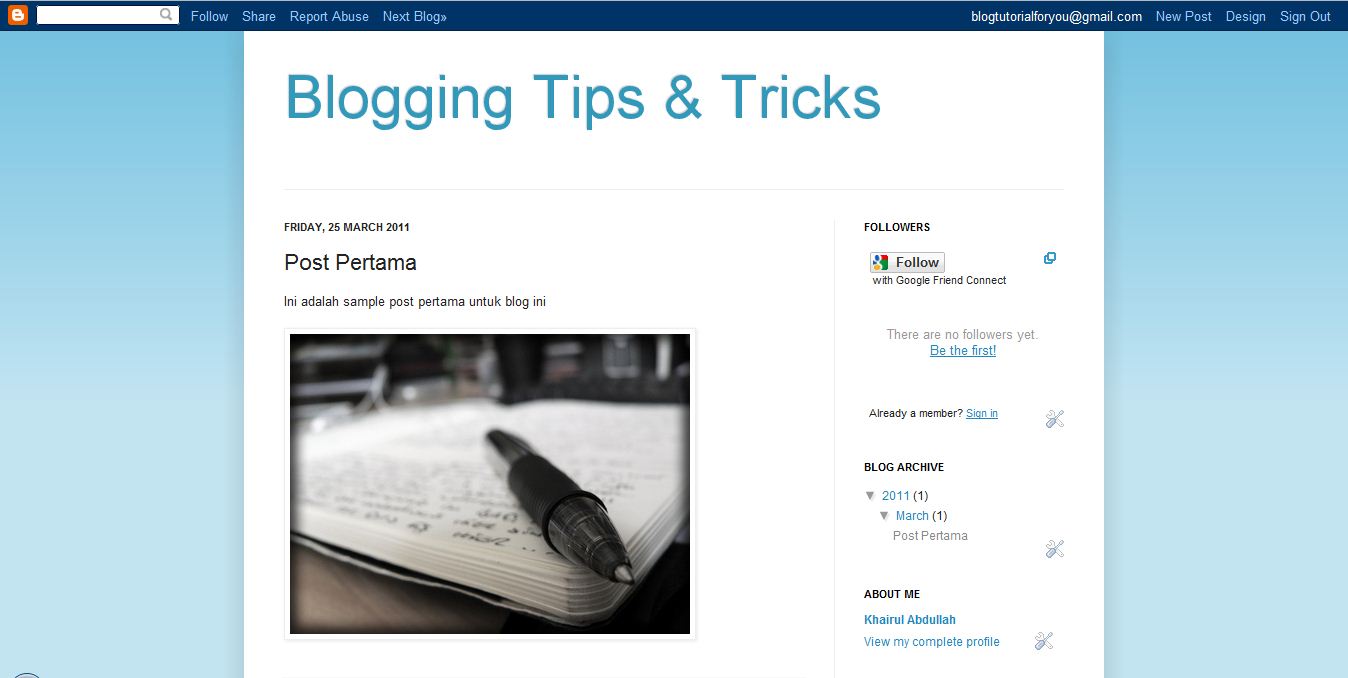
12.
Blog anda sudah kini sudah siap. Now your blog is ready.
 |
| Creating a blog tips - Klik untuk besarkan - Click to enlarge |
p/s : Sekiranya anda mempunyai pertanyaan, sila taip di ruangan komen. If you have any question, please ask in comment section.